Configure a Token
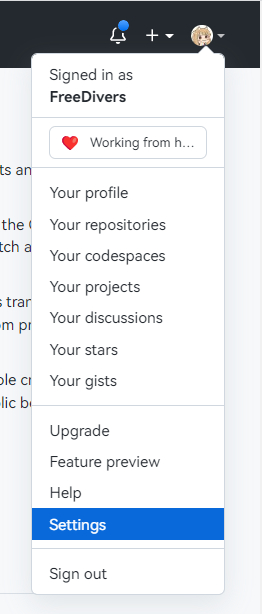
Open GitHub, click your avatar in the top-right corner, then click “Settings”.
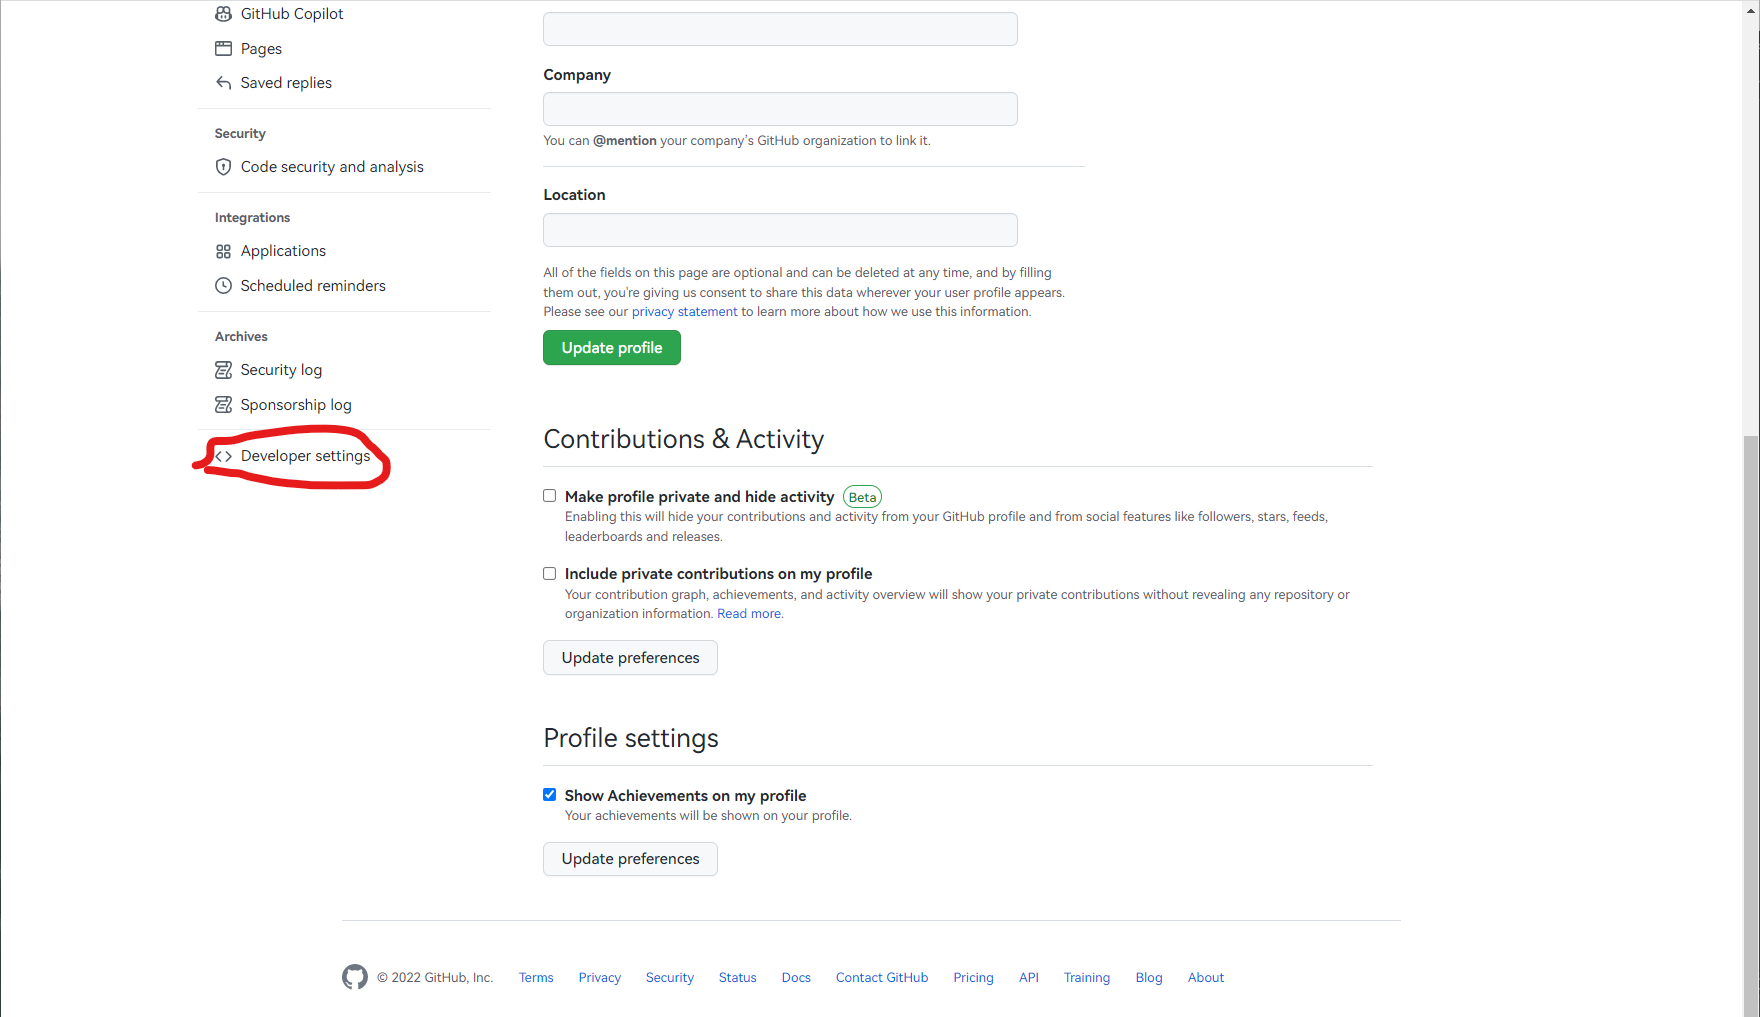
Scroll down and click “Developer settings”.
Click “Personal access tokens”, then “Generate new token”.
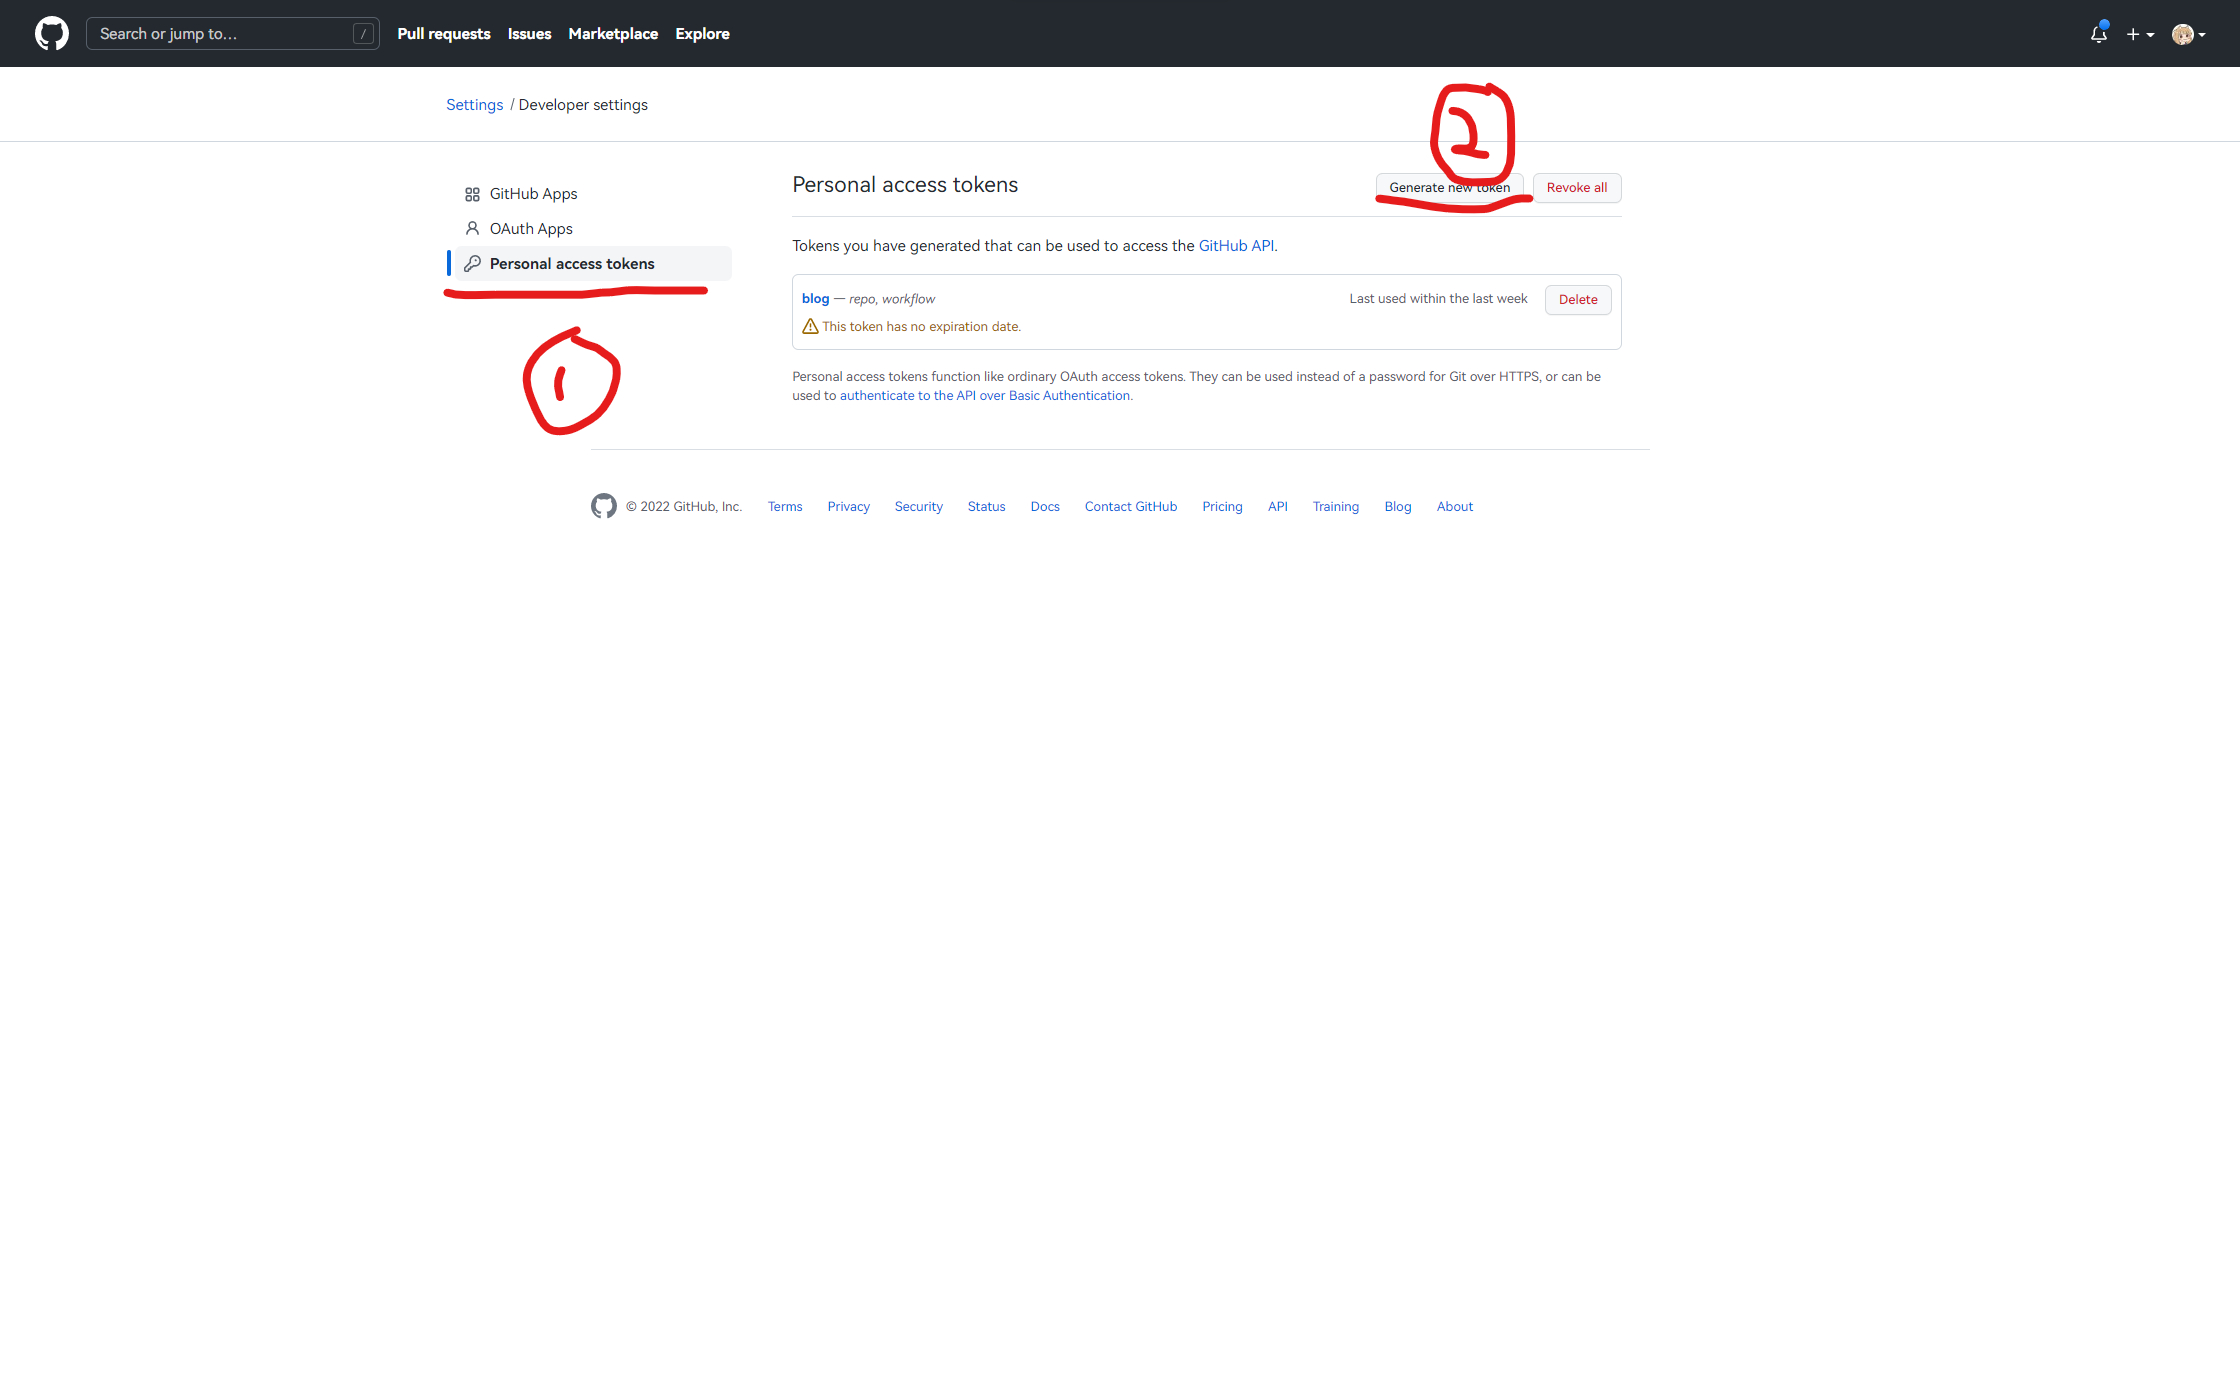
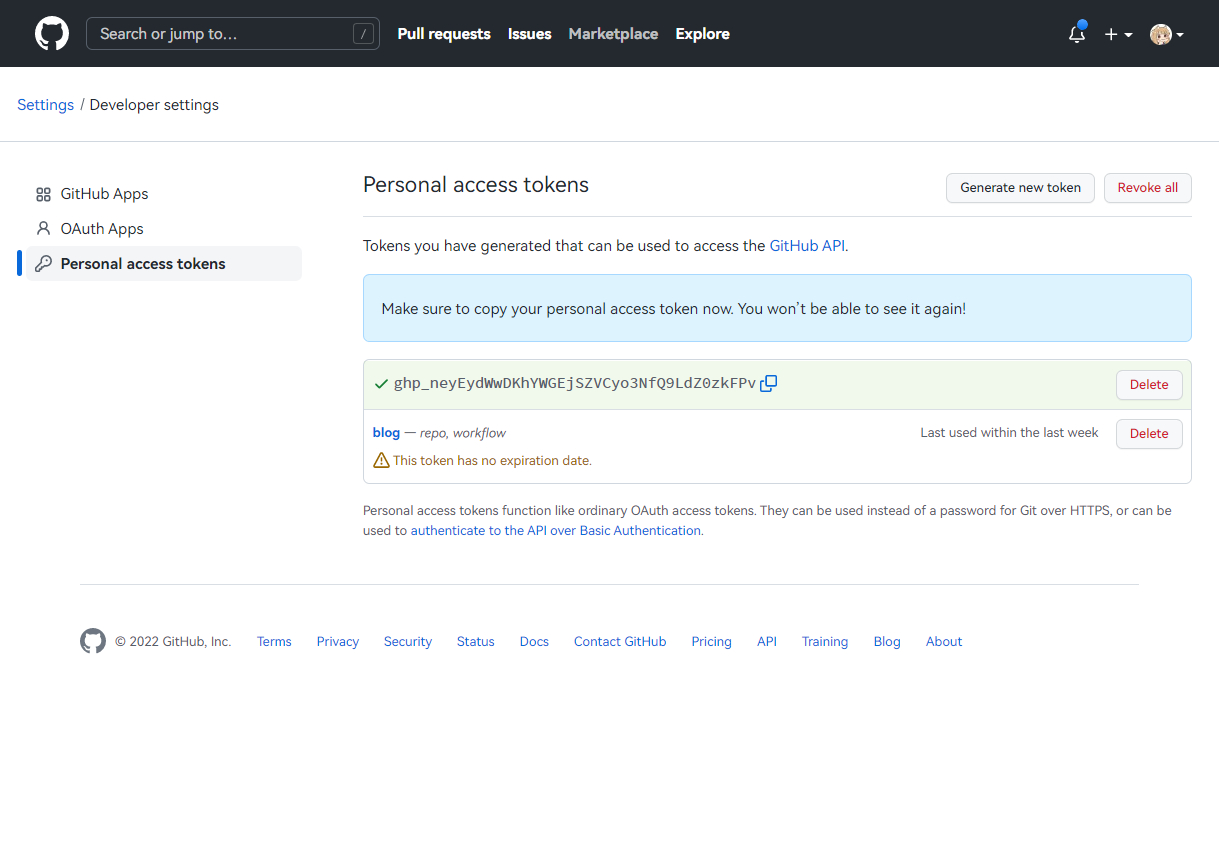
Enter any name, set “Expiration” to “No Expiration”, check repo and workflow, then click “Generate token”. Copy the generated token.
Important: The token is shown only once. Keep this tab open until everything is configured successfully.
Do not leak your token unless you fully trust the recipient.
Repository Setup
We want local pushes to go into your Hexo source repository, and then deploy from that repository to your GitHub Pages repository.
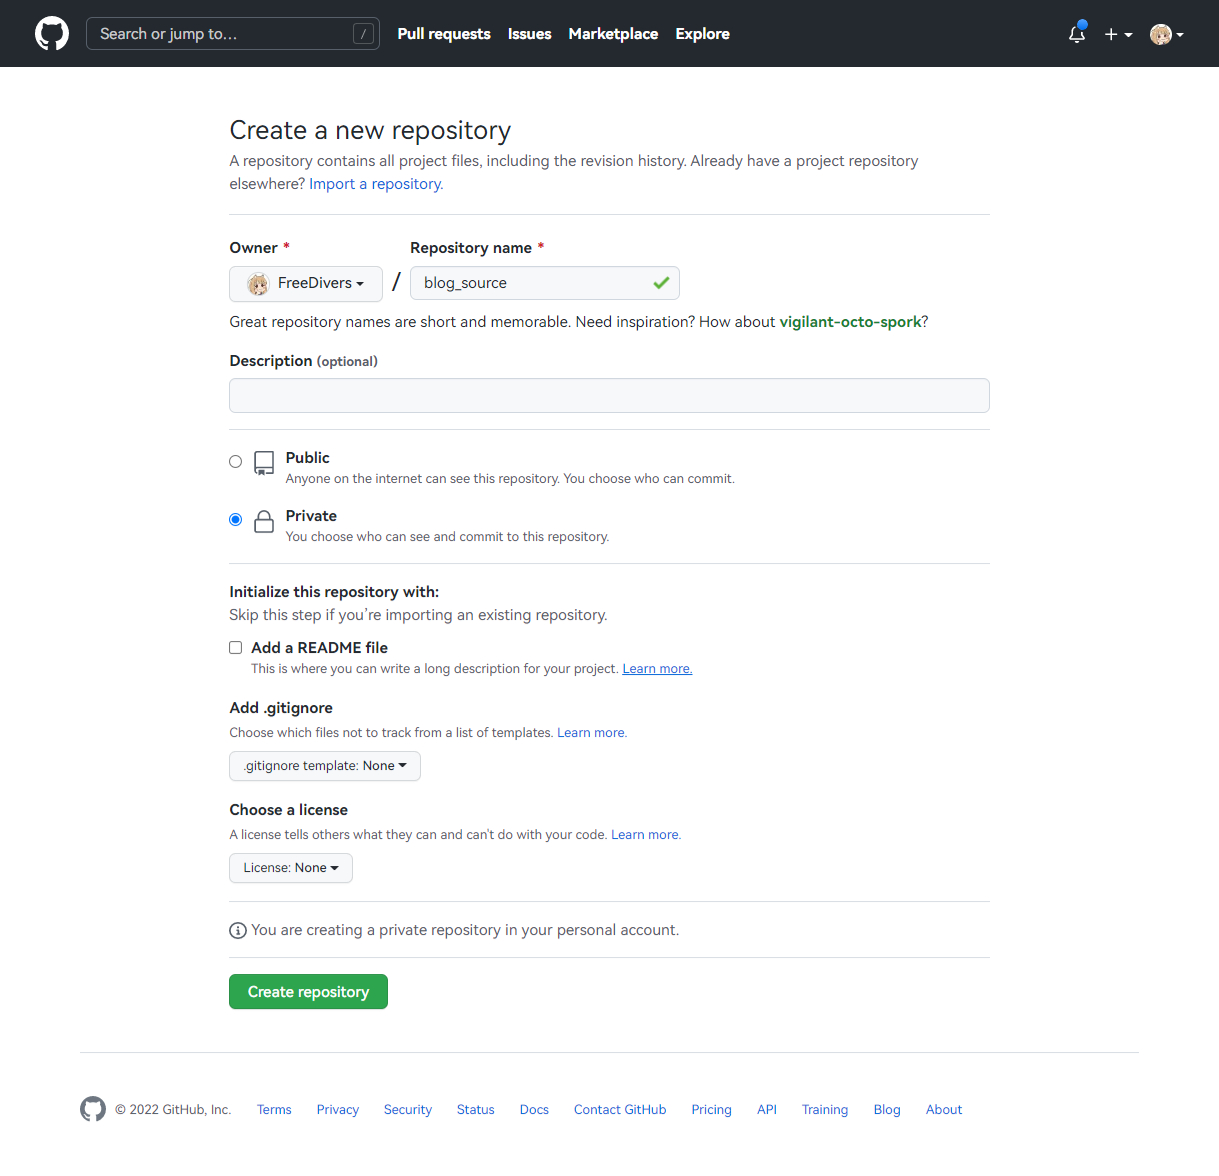
Create a new repository with any name, preferably something meaningful, for example Hexo_Blog_Source.
You can make it Public or Private based on your needs. If your source contains private data, do not make it public.
Open repository settings, go to Secrets -> Actions, then click New repository secret.
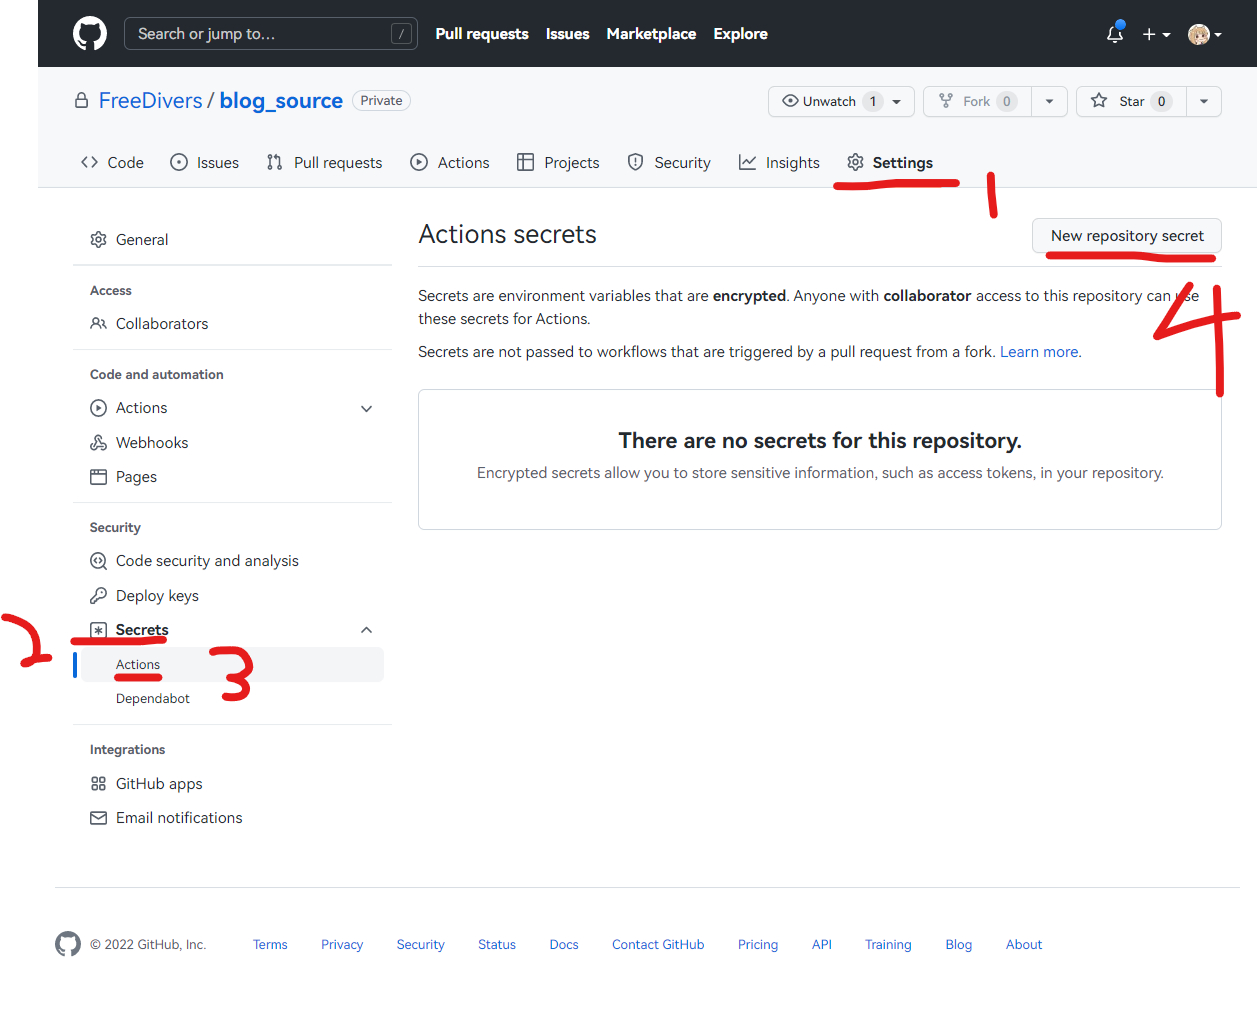
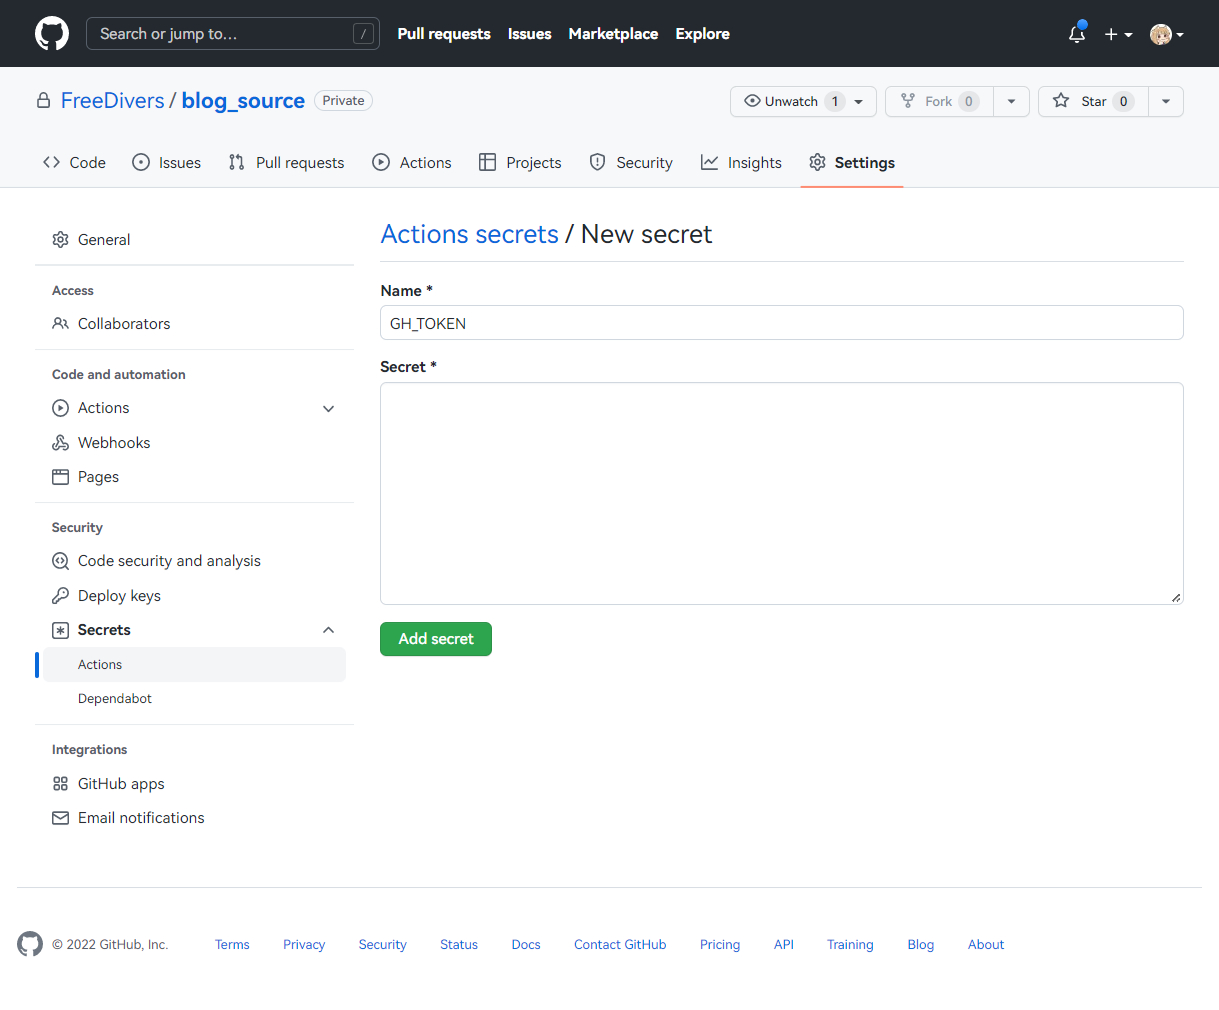
Set name to GH_TOKEN, paste your token, then click Add secret.
Git Setup
Open a terminal in your local blog folder.
If Git is not initialized yet:
git init
git branch -m main
Then connect your remote repository:
git remote add origin <your-remote-repo-url>
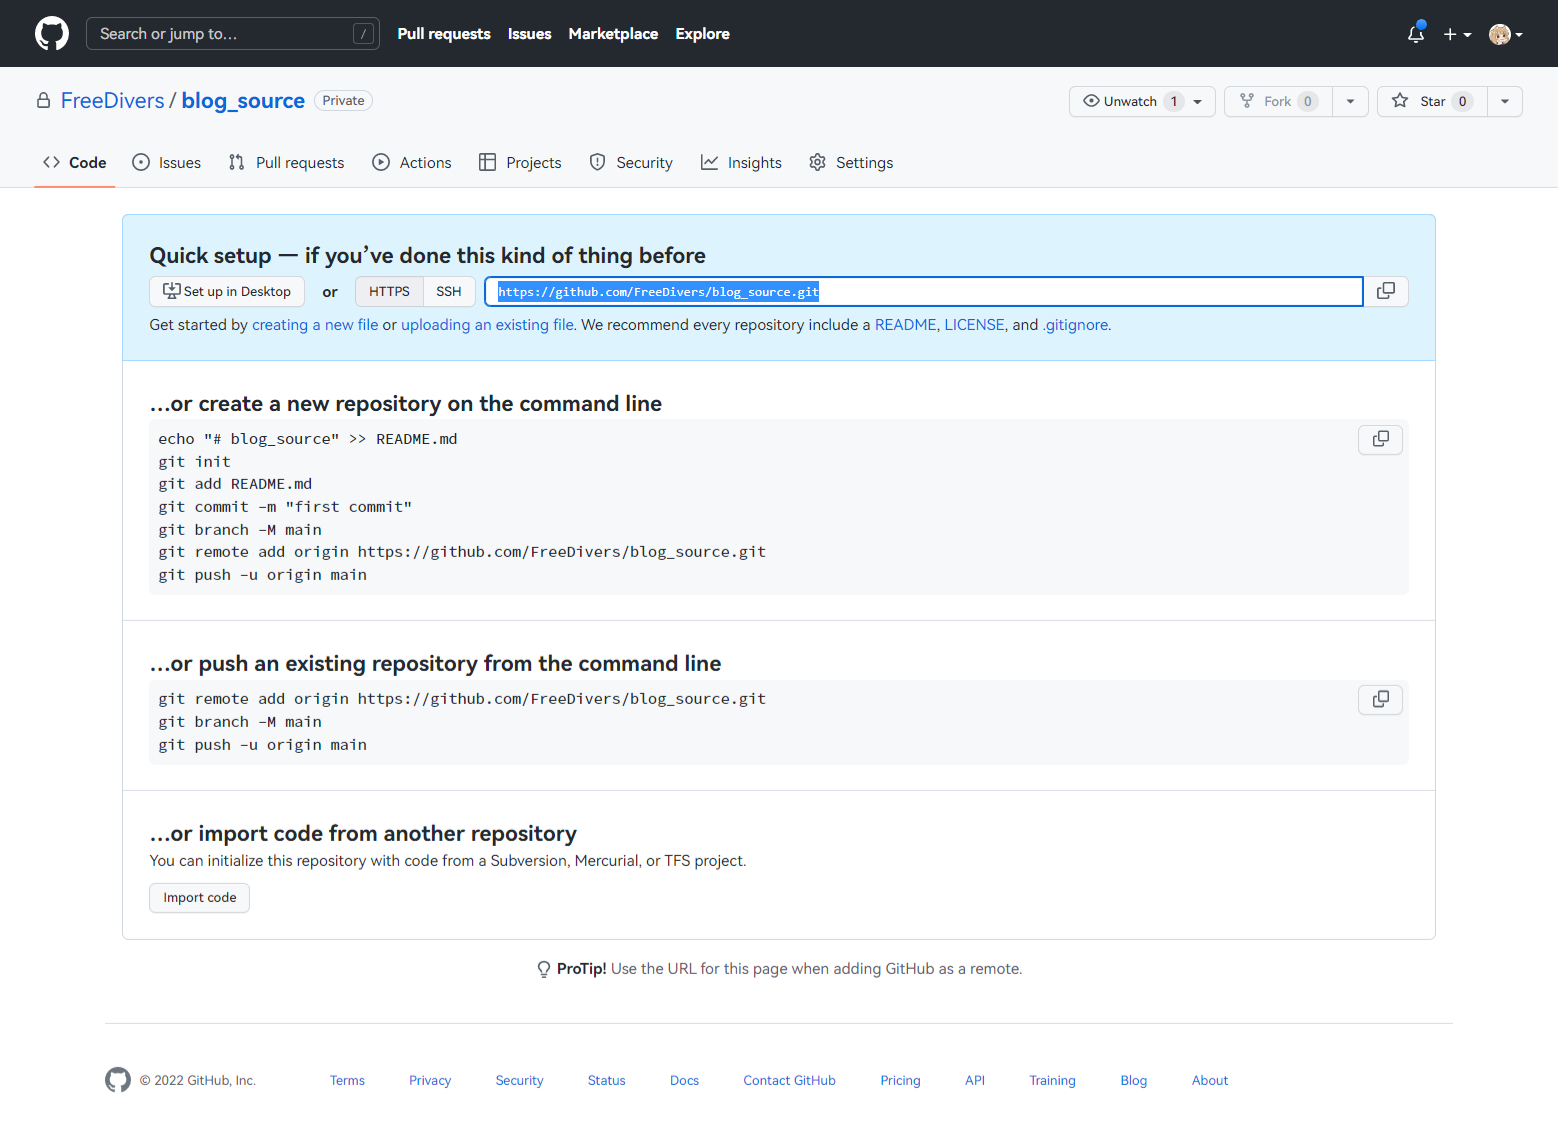
Click “Code” in GitHub and copy the remote URL.
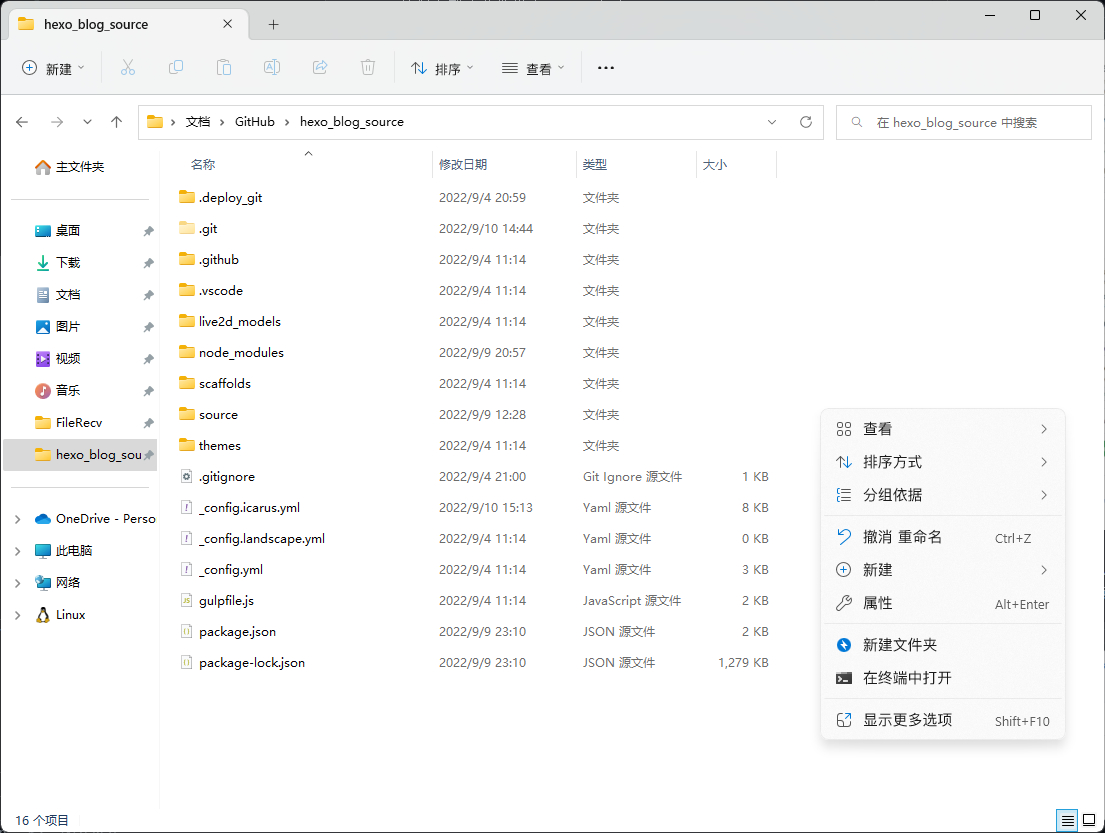
Create .github/workflow/ locally, then create autodeploy.yml inside it.

Open autodeploy.yml and fill in:
name: Auto Deploy

on:
  push:
    branches:
      - main
  release:
    types:
      - published

jobs:
  deploy:
    runs-on: ubuntu-latest
    steps:
      - name: Checkout branch
        uses: actions/checkout@v2
        with:
          ref: main

      - name: Setup Node
        uses: actions/setup-node@v1
        with:
          node-version: '16.x'

      - name: Install Hexo
        run: |
          export TZ='Asia/Shanghai'
          npm install hexo-cli -g

      - name: Cache dependencies
        uses: actions/cache@v1
        id: cache
        with:
          path: node_modules
          key: ${{runner.OS}}-${{hashFiles('**/package-lock.json')}}

      - name: Install dependencies
        if: steps.cache.outputs.cache-hit != 'true'
        run: |
          npm install --save

      - name: Generate static files
        run: |
          hexo clean && hexo generate -g -c 2

      - name: Deploy to GitHub
        uses: JamesIves/github-pages-deploy-action@v4
        with:
          token: ${{ secrets.GH_TOKEN }}
          repository-name: FreeDivers/FreeDivers.github.io # replace with your own: username/username.github.io
          branch: main
          folder: public
          commit-message: '${{ github.event.head_commit.message }} Updated By GitHub Actions'
Finally push your project:
git add .
git commit -m first_commit
git push origin main -u
If everything is correct, you can open Actions in the repository and see workflow results.
Exclude Files You Don’t Need to Upload
Some files/folders may not need to be uploaded. Excluding them saves upload and deploy time.
Edit .gitignore in your blog source root and add/remove items as needed.
The Updated-Time Reset Problem
After enabling auto deploy, every post’s updated time may become the deployment time. That’s because theme rendering often reads the updated field in front matter. If you define updated when writing, it will not be rewritten by deployment.
Fix for Future Posts
Open:
<blog-root>\scaffolds\post.md
Add:
date: {{ date }}
updated: {{ date }}
Save it.
Then when you create a new post:
hexo new post "title"
updated is added automatically.
Fix for Existing Posts
If you’ve already deployed automatically, you’ll need to edit updated manually.
If not yet deployed, you can also refer to this article.